SLAM

SLAM is simultaneous localization and mapping; the goal is to build/update a map while simultaneously keeping track of location within.

In other words, SLAM takes sensory data as input (such as camera, lidar, ultrasound) and outputs a partial map and location within.

A popular open source framework is called ORB SLAM. This is fast, robust, and efficient.


I’ll summarize my findings here.

There are three papers you can read that describes how it works. You should read them in order, because the ideas build on each other (1-2) and (3) describe improvements made.

1. Bag of Binary Words
2. ORB-SLAM paper
3. ORB-SLAM2 paper

I’m not much of an expert in this field, so I’ll try to explain in layman’s terms of how I understand it. Here are essence of what you need to know.

  • Sensory data are a stream, but it can be discretized, such as a video stream.
    • Discrete means to represent a real space using a discrete quantities.
  • Videos are sequences of images.
  • In an image, there are points that can be easily identified and tracked across images.
  • These points can be identified by an algorithm called Bag of Words (read 1).
    • A picture is like a paragraph, it can be described by visual words.
    • Visual words are small images that represent like noses, eyes, mouth.
    • With enough words, you can guess what objects you’re looking at, and from what angle.
    • For example, if you had two eyes and a nose, you would guess a face.
    • And if the two eyes are much bigger than the nose, you’re likely looking downward angle to the face.
  • Bag of Binary Words improve performances of the Bag of Words (BoW) model.
  • The ORB-SLAM system uses the BoW model to build a database.
    • Database stores BoW features that represent an image.
      • Meaning the image was converted into BoW features.
    • These features are used as an index into a location map.
  • From an image and a location, a Key Frame can be created.
    • Key Frames are an association container, which can represent a mapping of BoW features into a frame in location space, and vice versa.
  • Using these BoW features, and sensor calibration data, a location is triangulated from mathematical calculation.
  • Many of these Key Frames are linked together.
    • You can think of Key Frames being a vertex in a graph, and an edge represent co-visibility.
      • That is, the BoW feature is visible from the other Key Frame as well.
    • This graph is called a covisibility graph.
    • Which represents a map.
  • Having this graph aids in knowing when to insert a new Key Frame into the database.
    • For example, when two Key Frames have less than 75% common BoW features.
  • When given an image, the database is asked to return a list of plausible locations.
    • The image is converted into BoW feature.
    • This feature is used to search the covisibility graph to find similar Key Frames.
    • Returns a list of Key Frames with statistical likelihood to represent which Key Frames contains the most matched BoW features.
    • The covisibility graph reduces search complexity, therefore speeding up search, and also reduces storage needs.
  • So now a map is being built at the same time it is localized.
    • SLAM.
  • In the future, we can come back with more data to:
    • Improve the map.
    • Ask the database for a localization result.

That’s all folks. I’ll add some pictures later.

Here’s a video.
 

Tools I’m loving now

Clion (actually you do not need to purchase a license if you use the EAP (Early Access Program) license. Downside is you have to download a new one each month. But it’ll be free to use for 1 month, and you don’t have to pay $199 USD per year.
https://www.jetbrains.com/clion/nextversion/?fromIDE=

HackerRank
Terminator
Sublime
OpenCV
Python
Tensorflow
Slam mono
Slack
Fish Shell
Git/GitLab
C++11

Websocket Socketio Rant

Websocket Socketio Rant

I learned that websocket is not the same as socket.io. While this may seem obvious in hindsight, I wasn’t aware I was using socket.io until I spent a long time trying to figure out why I couldn’t use websocket (ws://) protocol to connect to my (http://) server, which used socket.io to handle websocket connections. Socket.io is built on top of the websocket protocol, but also supports old, non-websocket-supporting browsers. I was setting up a simple Python Flask webserver, and was using Flask Socketio. I thought they were one and the same.

Another thing I found is, as of now (Sept 2017), there are poor support for python socket.io clients. Of about the only two python packages I found to handle socketio, there seems to be many inconsistencies in the library function and I couldn’t predict the behaviour of what it was supposed to do. After many hours of fussing about, I switched to C++ socketio library (sio_client.h). And it works very well, I got it to work quickly.

Swapping Macbook Pro SSD

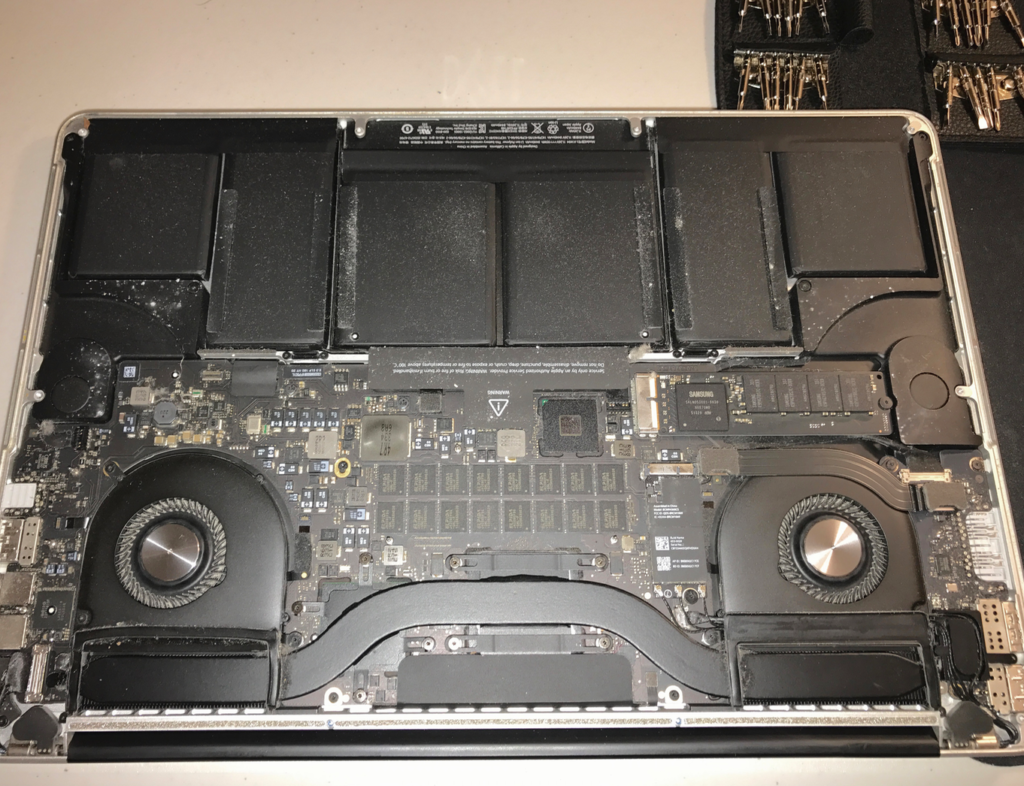
Yes. You can upgrade to a newer MacBook Pro by just swapping the SSD. I looked around the webs and couldn’t find whether it was feasible, so I just did it.

I had a Late-2013 MBP and a Mid-2015 MBP. Both are same in every aspect, except (1) GPU, (2) TrackPad, (3) Keyboard, (4) Battery.

  1. New AMD Radeon R9 M370X vs. older Nvidia GeForce GT 750M. Both discreet GPU performs well. Nvidia has a faster clock but AMD has slightly better benchmarks.
  2. New TrackPad had Force Touch. This means I didn’t need to keep two fingers to press; one to aim, one to click the bottom.
  3. New Keyboard feels more responsive, more rubbery, less force needed to push. This slight difference can only be felt when gotten used to the older one.
  4. New Battery is a big issue for me. I had close to 500 cycles on the old laptop, and this new one has like 20.

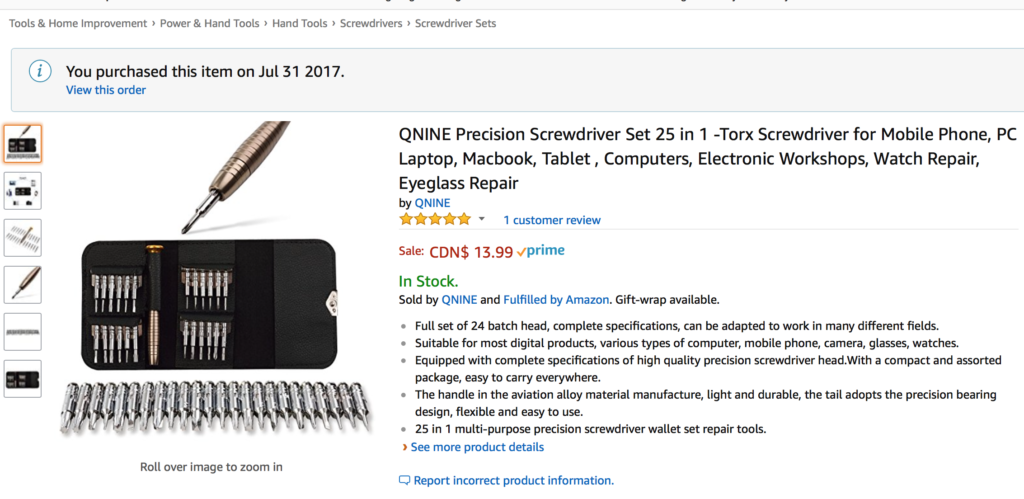
I opened both and swapped their SSDs. To open Apple’s proprietary screws require a Pentalobe P5 (1.2mm), and a Torx T5 (or was it T4?).

Both booted as normal. Not much difference in hardware. I did it for science and curiosity. Plus I could air blast the dust out of the vents.

I was signed out of iCloud and other email accounts. Safari and Chrome extensions were lost. Safari extension LastPass was already logged in when I reinstalled, and Chrome too.

Nginx hosting multiple domains with a single SSL certificate from Let’s Encrypt


Multiple domains can be hosted with nginx server blocks. Below I give an example of how to generate a shared SSL certificate from Let’s Encrypt, and how to setup two server blocks to use a shared SSL certificate.

Assuming you use Let’s Encrypt as your CA authority, generate a SSL certificate for the domains:

sudo letsencrypt certonly -a webroot --webroot-path=/var/www/default/html/ -d example.org -d example.com

Alternatively, if your not using Let’s Encrypt as your CA, read up the docs http://nginx.org/en/docs/http/configuring_https_servers.html take a pause to note:

The SSL certificate needs to contain several names, in the SubjectAltName certificate field, for example, you might want to have example.com and example.org domains. Note the SubjectAltName field length is limited, to about 1000 characters IIRC.

Now I assume you have the SSL certificate generated.

Update the two server blocks /etc/nginx/sites-available/example.com and /etc/nginx/sites-available/example.org accordingly. A /etc/nginx/sites-available/default is not need. See the diff:

server {                                                        server {
  listen 80;                                                      listen 80;
  listen [::]:80;                                                 listen [::]:80;
  server_name example.com;                                    |   server_name example.org;
  return 301 https://$server_name$request_uri;                    return 301 https://$server_name$request_uri;
}                                                               }
server {                                                        server {
  server_name example.com;                                    |   server_name example.org;
  listen 443 ssl http2;                                           listen 443 ssl http2;
  listen [::]:443 ssl http2;                                      listen [::]:443 ssl http2;

  ssl_certificate /etc/letsencrypt/live/default/fullchain.pem     ssl_certificate /etc/letsencrypt/live/default/fullchain.pem
  ssl_certificate_key /etc/letsencrypt/live/default/privkey.p     ssl_certificate_key /etc/letsencrypt/live/default/privkey.p
  include snippets/ssl-params.conf;                               include snippets/ssl-params.conf;

  root /var/www/example.com/html;                             |   root /var/www/example.org/html;
  index index.php                                                 index index.php 
  location / {                                                    location / {
    try_files $uri $uri/ /index.html =404;                          try_files $uri $uri/ /index.html =404;
    autoindex on;                                                   autoindex on;
  }                                                               }
  location ~ /.well-known {                                       location ~ /.well-known {
    allow all;                                                      allow all;
  }                                                               }
  location ~ \.php$ {                                             location ~ \.php$ {
    include snippets/fastcgi-php.conf;                              include snippets/fastcgi-php.conf;
    fastcgi_pass unix:/var/run/php5-fpm.sock;                       fastcgi_pass unix:/var/run/php5-fpm.sock;
  }                                                               }
}                                                               }

Note the folder that contains the SSL certificates /etc/letsencrypt/live/default/. You may need rename the folders that letsencrypt generated.

Additional references:


https://www.digitalocean.com/community/questions/letsencrypt-for-multiple-domains-on-nginx