Introduction
In this blog post, we’ll guide you through setting up a PXE (Preboot Execution Environment) boot server with netboot.xyz on Ubuntu, leveraging dnsmasq for a simplified setup. This configuration allows networked machines to boot various operating systems from a single server, ideal for labs, data centers, or rapid OS deployments.
What is PXE Booting?
PXE booting enables computers to load and boot an operating system from a network server. This method is extensively used for system installations, recovery, and testing different operating systems without local storage.
Why netboot.xyz?
netboot.xyz is an open-source initiative that simplifies the PXE boot process with a dynamic boot menu, allowing selection from a range of operating systems and tools. This capability is crucial for efficient network and system management.
Why dnsmasq?
It supports DHCP and TFTP services, which is a more streamlined approach for setting up a PXE boot environment. Alternatively you can use isc-dhcp-server and tftpd-hpa.
Prerequisites
- An Ubuntu 22.04 server (referred to as
pxehost). - Basic Linux and network configuration knowledge.
- Root or sudo privileges on the server.
Step 1: Installing Dnsmasq
Dnsmasq serves as both the DHCP and TFTP server, streamlining the setup. Install it using:
sudo apt-get update sudo apt-get install -y dnsmasq
Step 2: Configuring Dnsmasq
Edit /etc/dnsmasq.conf to include DHCP and TFTP settings:
sudo nano /etc/dnsmasq.conf
Add the following configuration:
# DHCP Settings dhcp-range=192.168.2.30,192.168.2.200,255.255.255.0,24h dhcp-option=option:router,192.168.2.1 dhcp-option=option:dns-server,localhost,1.1.1.1 dhcp-boot=netboot.xyz.kpxe # TFTP Settings enable-tftp tftp-root=/var/lib/tftpboot
Restart dnsmasq to apply the changes:
sudo systemctl restart dnsmasq
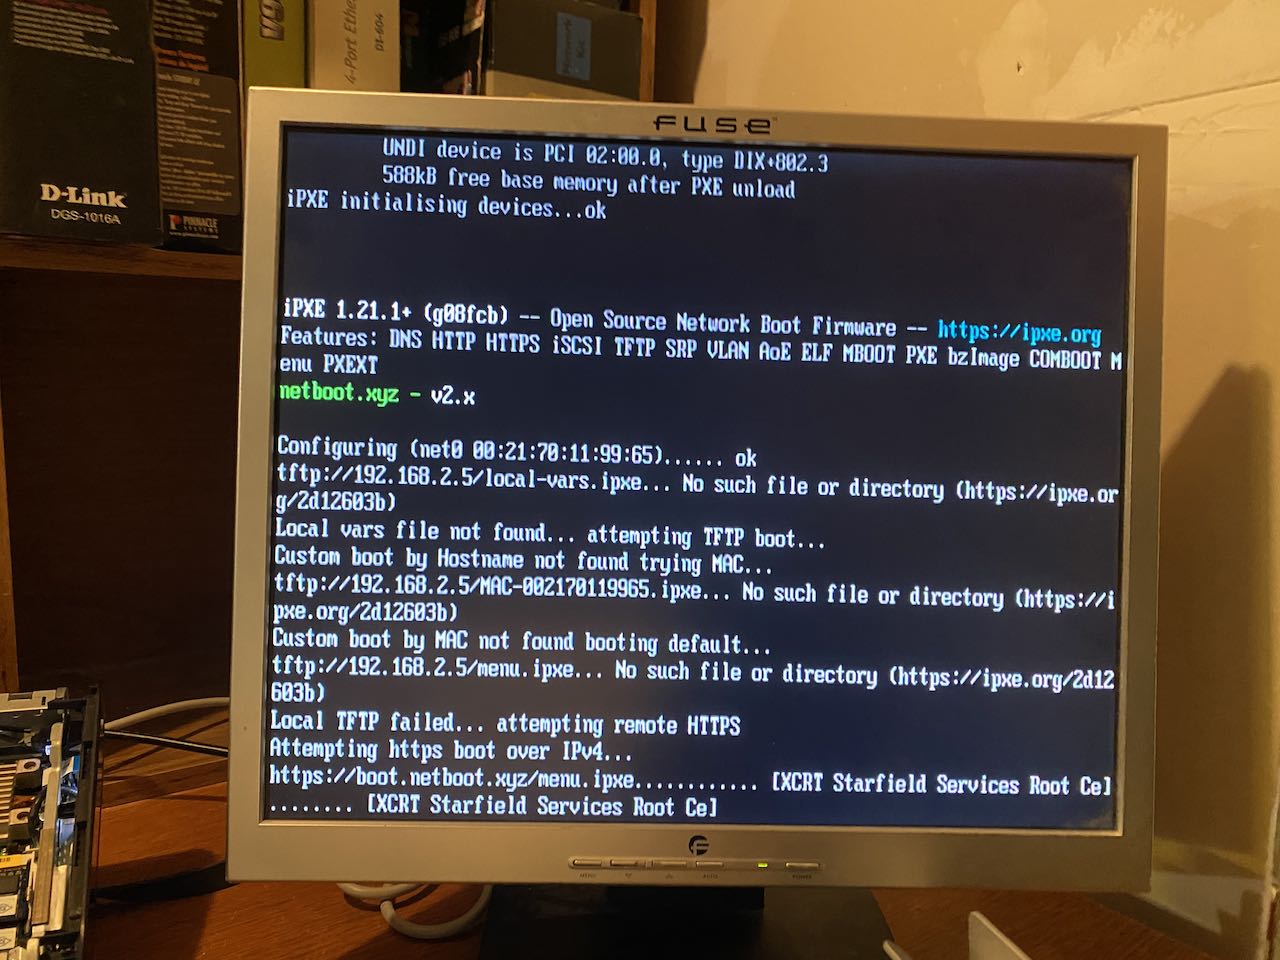
Step 3: Setting Up netboot.xyz
Download the netboot.xyz boot files into the TFTP directory:
sudo mkdir -p /var/lib/tftpboot cd /var/lib/tftpboot sudo wget https://boot.netboot.xyz/ipxe/netboot.xyz.kpxe sudo wget https://boot.netboot.xyz/ipxe/netboot.xyz.efi
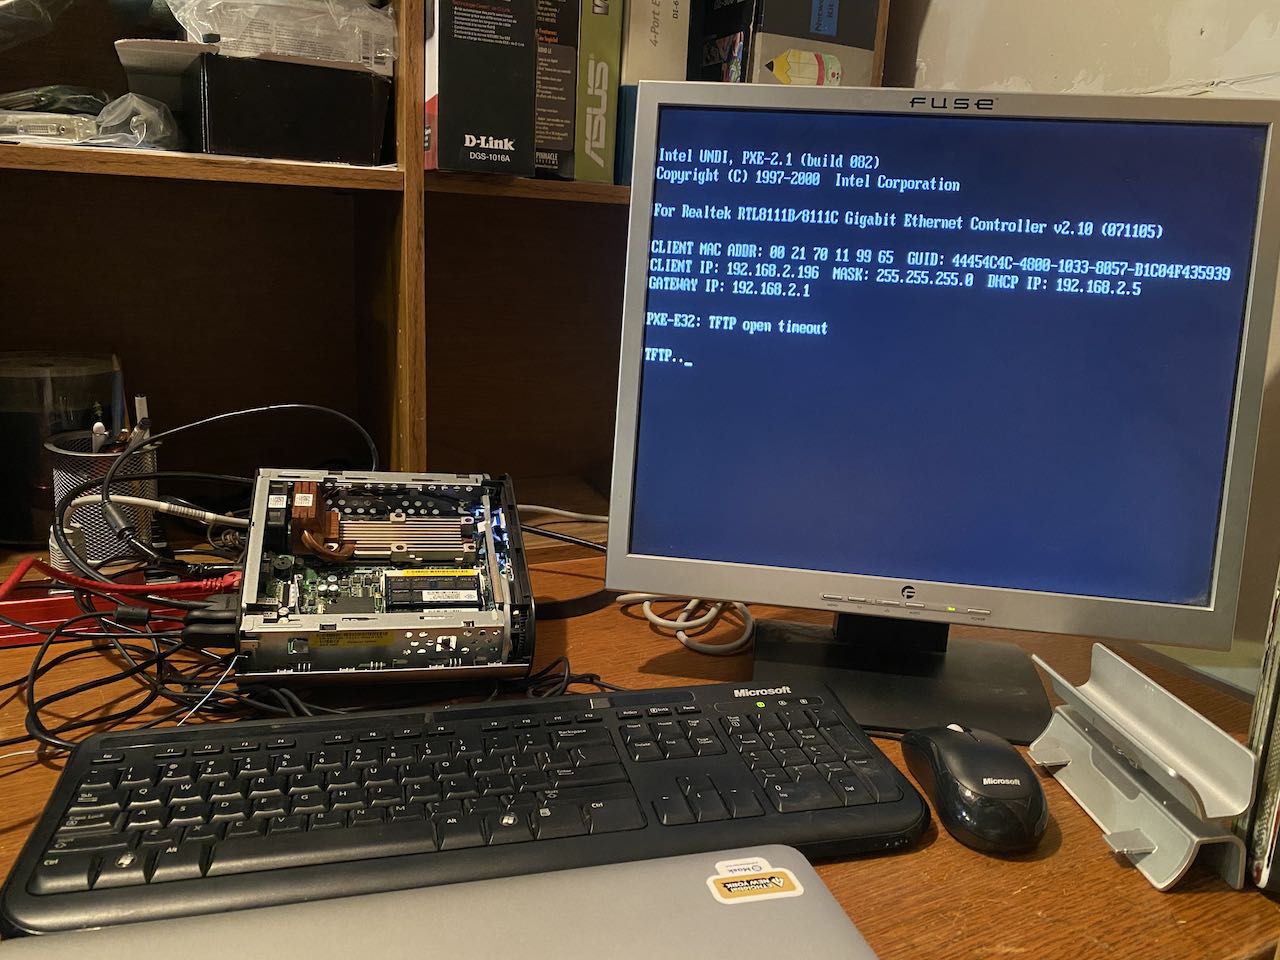
Step 4: Testing the PXE Boot and Troubleshooting
Test the PXE boot on a client machine. If issues arise, check the dnsmasq logs:
bashCopy code
grep dnsmasq /var/log/syslog
For TFTP issues, attempt a manual TFTP download from another machine:
bashCopy code
tftp 192.168.2.5 get netboot.xyz.kpxe quit
Confirm that the TFTP server is correctly configured and accessible.
Conclusion
Using dnsmasq for PXE booting with netboot.xyz offers a streamlined, efficient approach to network booting. This setup is ideal for environments requiring quick and versatile OS deployments and system management.